Skip to content

Category: WordPress

  • Say Goodbye to chown: Fixing WordPress File Permissions in Docker on Windows with WSL

    Say Goodbye to chown: Fixing WordPress File Permissions in Docker on Windows with WSL

    If you’re developing WordPress themes or plugins locally on Windows using Docker inside of WSL, you’ve likely run into a frustrating and time-consuming problem: the constant battle with file permissions.

    One minute, you need to set your theme files to adam:adam so you can edit them in your IDE like PhpStorm or VS Code. The next, you need to switch them to www-data:www-data so that the web server can run a server-side process, like an automatic SCSS compiler. Then, to update a plugin from the WordPress admin panel, you have to switch the permissions back again.

    This constant chown shuffle is a major drag on productivity. I recently faced this exact scenario with a specific local development stack:

    • Host OS: Windows 11
    • Linux Environment: WSL (Ubuntu)
    • Containerization: Docker Desktop
    • WordPress Image: The official wordpress:latest
    • Workflow: WordPress files mounted from my local WSL filesystem into the container.

    The goal was simple: edit files as my local user while allowing the WordPress container to perform its necessary file operations without constant permission changes. After some trial and error, I landed on a clean, permanent solution. This fix has been tested for the environment above and works perfectly.

    The Core of the Problem: A User ID Mismatch

    The friction comes from a fundamental conflict between users. On your WSL instance, your user (adam in my case) owns the project files. This user has a specific User ID (UID) and Group ID (GID), which are typically 1000 and 1000 for the default user on most Linux distributions.

    However, inside the official wordpress:latest Docker container, the Apache web server runs as the www-data user by default. This www-data user has a different UID and GID (usually 33). When WordPress needs to write a file—like scssphp compiling a stylesheet or a plugin being updated—it does so as www-data. Since the UIDs don’t match, you get permission errors unless you manually change the file owner to www-data.

    Worse yet, I noticed that on some occasions, a process would create a file owned by root, adding yet another layer of complexity. The solution is to stop juggling users and just make them the same.

    The Solution: Synchronize Your User with the Container

    The most robust fix is to tell Docker to run the Apache process inside the container using your own user’s UID and GID. This way, from the file system’s perspective, your local user and the web server user are identical. Any file you create can be read/written by the server, and any file the server creates is owned by you.

    Here’s how to do it in two simple steps.

    Step 1: Find Your User and Group ID in WSL

    First, you need to find the UID and GID of your user inside your WSL terminal. It’s almost certainly 1000:1000, but it’s always best to verify.

    Open your WSL terminal and run the following command:

    Bash

    id -u && id -g
    

    This will print your UID and GID. Take note of these numbers.

    Step 2: Update Your docker-compose.yml

    Next, open the docker-compose.yml file in your project root. We are going to add a single, powerful directive to your WordPress service configuration: user.

    Find the service definition for your WordPress container and add the line user: "1000:1000", replacing 1000:1000 with your actual UID and GID if they are different.

    Here is a before-and-after example:

    Before:

    YAML

    version: '3.8'
    services:
      wordpress:
        image: wordpress:latest
        volumes:
          - ./wp-content:/var/www/html/wp-content
          # other configurations...
        ports:
          - "8080:80"
        restart: always
    

    After:

    YAML

    version: '3.8'
    services:
      wordpress:
        image: wordpress:latest
        user: "1000:1000" # Add this line!
        volumes:
          - ./wp-content:/var/www/html/wp-content
          # other configurations...
        ports:
          - "8080:80"
        restart: always
    

    Step 3: Rebuild and Verify

    Save your docker-compose.yml file. Now, stop and rebuild your container to apply the change. Run this command from your project directory in the WSL terminal:

    Bash

    docker-compose down && docker-compose up -d --build
    

    Once the container is running, you can verify that it’s working. Have WordPress perform an action that creates a file. In my case, I deleted my old compiled CSS file and reloaded a page, which triggered the scssphp compiler.

    Then, check the file’s ownership in your terminal:

    Bash

    ls -l wp-content/themes/your-theme/path/to/main.css
    

    The owner should now be your local user (adam adam). Success! You can now edit the file, and the server can still overwrite it when it recompiles, with zero permission conflicts.

    A Smoother Path Forward

    By synchronizing the container’s user with your local user, you eliminate the source of the permission conflict entirely. This simple, one-line change to your docker-compose.yml creates a seamless and efficient local development workflow. No more context switching, no more running chown—just smooth, productive coding.

    Disclaimer: This solution has been specifically tested and confirmed to work with a development environment running on Windows, using Docker Desktop with the WSL backend, and running the official wordpress:latest image with locally mounted files. While the principles apply more broadly, the exact implementation may differ in other environments.

  • I published an accessibility plugin called Open Accessibility!

    Within the last couple of months, I was updating plugins for one of my employer’s WordPress sites. The accessibility plugin that I had been using and that had been an incredibly popular plugin had been called One Click Accessibility. There was a major version update from 2.x to 3 and when I installed it, I was met with a wildly different plugin. Long story short, the plugin was sold to Elementor and then went commercial.

    This really, really pissed me off. I could have just stayed on version 2 of the plugin perpetually but so many other people got screwed as well. There are many other accessibility plugins available in the WordPress plugin repository but I decided to make my own out of spite.

    Accessibility platforms like UserWay and Accessibe are prevalent and big business but while they will give you a widget or something to add to your site to assist those who need with things like text size, color contrast and the like, what they are selling is a “cover your ass” service in the even that you get sued. They aren’t marketing a product to help people, they are selling fear and then a handy peace of mind solution to those who think they need it.

    I don’t know, I have a fundamental problem with making money directly or indirectly from people who have a disability or who are differently-abled. The argument can be made that commercial accessibility offerings aren’t protecting site owners from people with disabilities but rather the trolls that will sue anyone for anything and then offer a settlement to make a quick, shitty buck. Those people exist and they suck but site owners that genuinely give a shit about their users should have options a-plenty.

    The project was always intended to be open source and while it can’t provide any type of legal services, it can at least help make the best effort possible to accommodate all type of different use cases for people with different needs.

    You can find my official plugin here. This project is (and will always be) open source and my GitHub repo can be forked if you want to make it your own. I plan to actively work on this and incorporate feedback as well as new features so please let me know what you think and what you might want to see!

    By the way, I am using the plugin on this site so you can take it for a test drive and see if you think it could work for you and your sites.

  • Set Tag Order WordPress Plugin

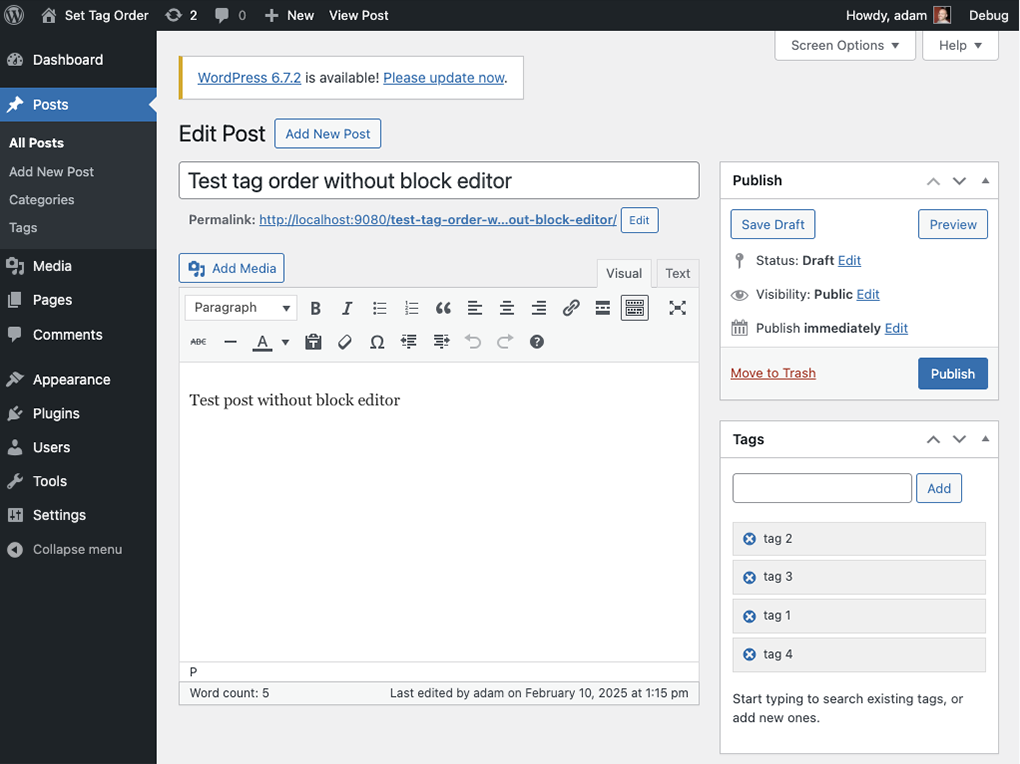
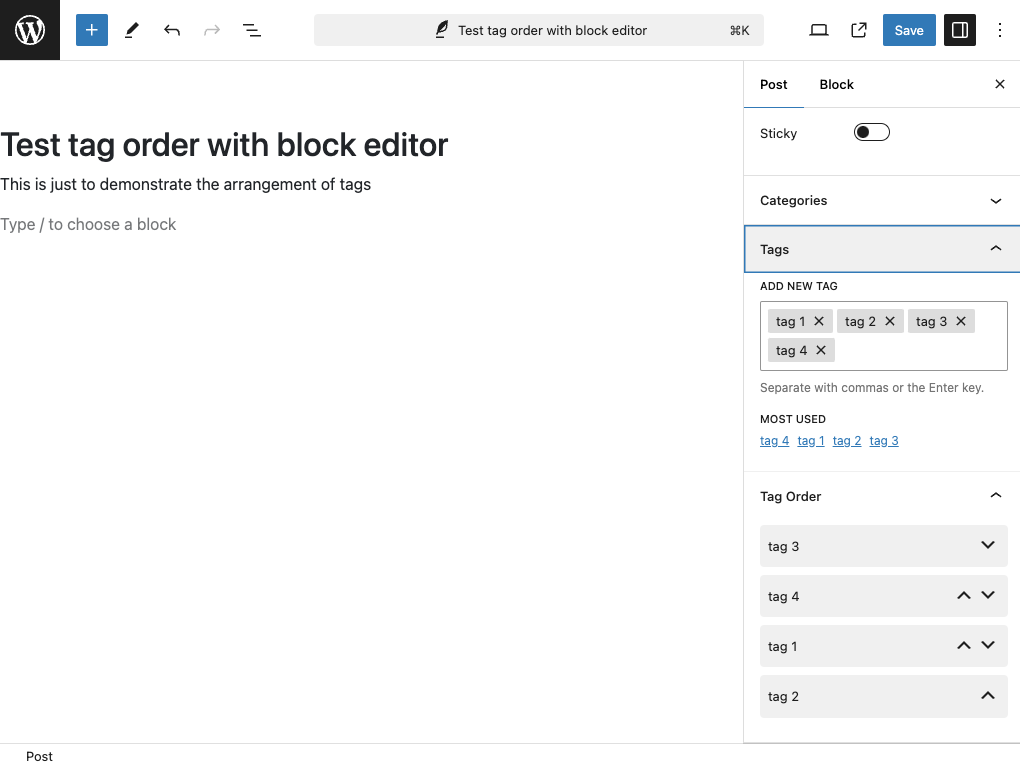
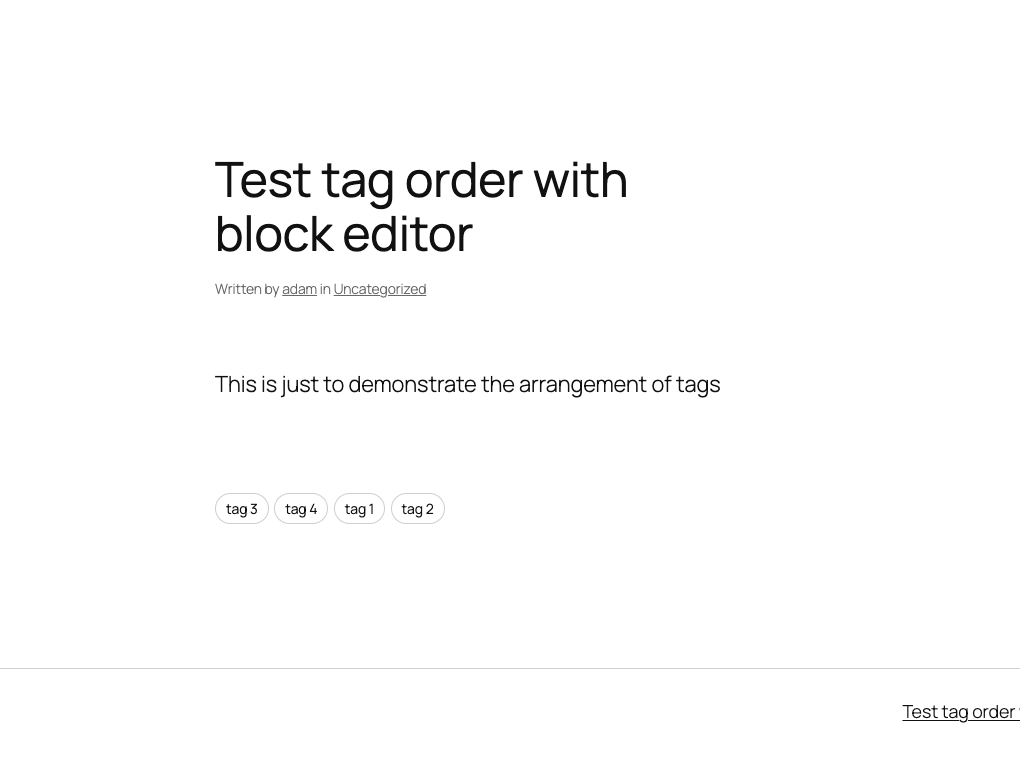
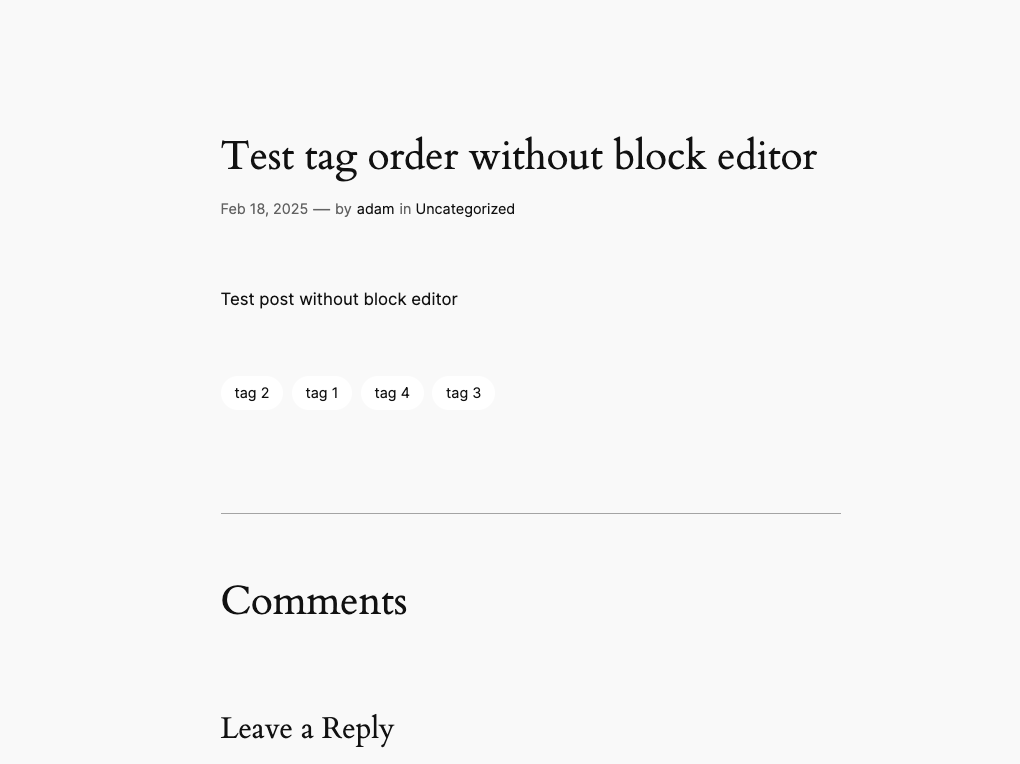
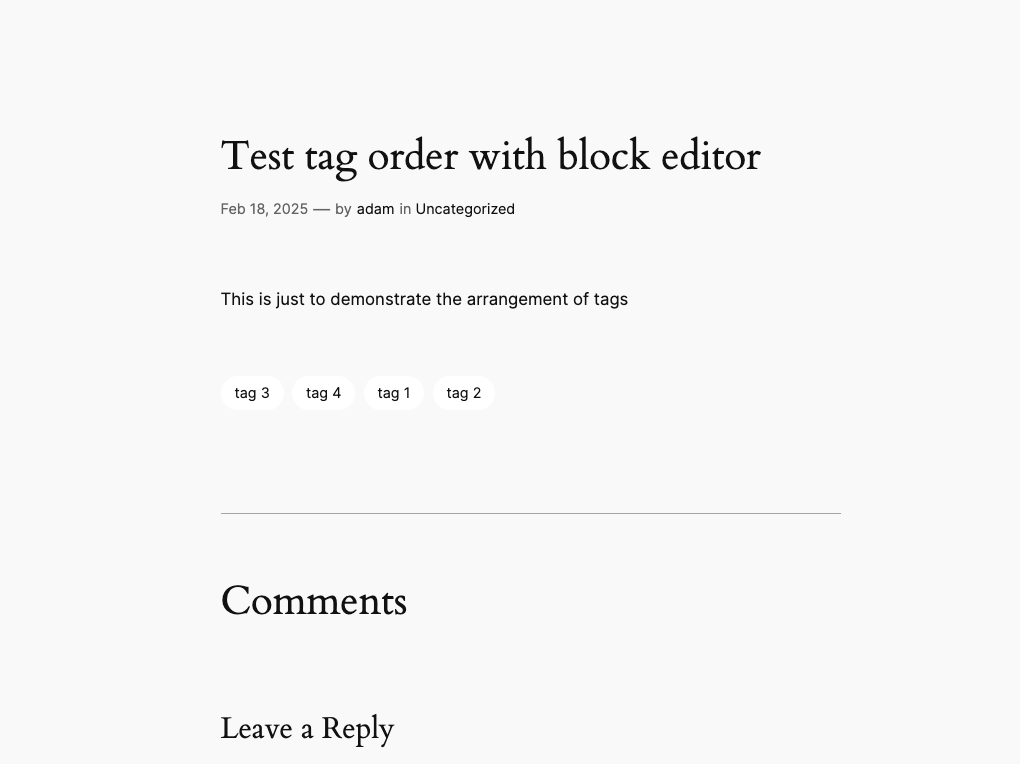
    A few months ago, I was asked to solve what I thought was a simple problem. The question was, “Can we set the display order of tags?” It seemed like a very benign question until I started to dig into it and discovered that it’s, in fact, not a simple question at all. WordPress, by default, sorts tags alphabetically when you use the get_tags() function.

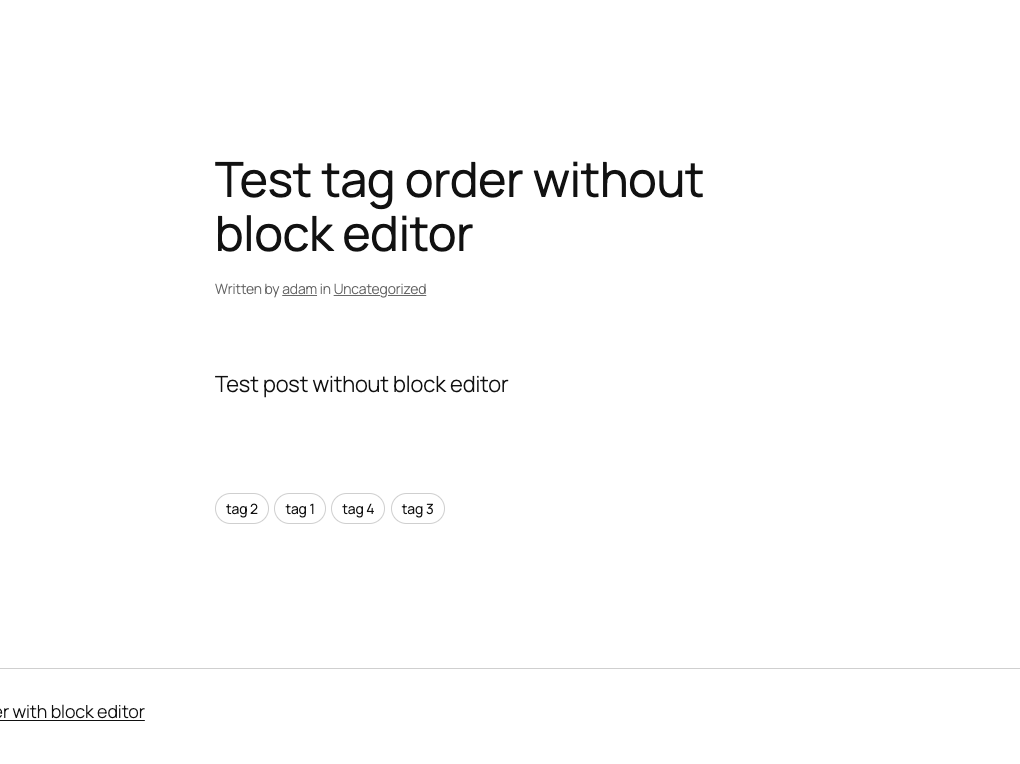
    The problem I was asked to create a solution for was to allow the editor to specify the order that tags are rendered on the corresponding post page. It was way more involed thatn I had anticipated but ultimately, I created a plugin that works with both the block editor and classic editor and should also work with any theme that displays tags using the get_tags() function.

    I’ve attached some screenshots to help illustrate but the plugin can be downloaded directly from my GitHub. I have made this public and welcome any and all feedback or feature requests!

    This plugin is now also listed in the WordPress plugin directory! You can download it from WordPress.org here or add it directly from your WordPress installation.

  • Out With Ghost, In With WordPress

    As much as using WordPress is cliche, my current job revolves around WordPress so it seemed fitting to use it personally as well. I had been using Ghost since I had been fully immersed in NodeJS, Next, React and researching any ‘new hotness’ JS frameworks or libraries that seemed to materialize out of thin air every few days.

    I like Ghost and it did everything I wanted and was very easy to set up and maintain on my Raspberry Pi web server. I appreciated not having to use plugins for features that WordPress should have built into the core long ago. I really appreciated the content editor which was very fast, and had all of the content editing and layout features I wanted. The templating engine was a bit of a learning curve but once I looked at some different themes and poked around under the hood, I was able to figure out how to get the frontend to do what I wanted it to do.

    Having been a PHP person for almost my entire professional career, WordPress was always looming over my shoulder. When I started to delve deep into NodeJS and other JavaScript or TypeScript-based frameworks, using Ghost for my own site seemed befitting. It was easy enough to set up and self-host on a Raspberry Pi so that’s what I did.

    Alas, I find myself fully immersed in WordPress on a daily basis. I wouldn’t have considered myself a WordPress developer before but I certainly would now. In less than a year’s time, I’ve learned sooooooo much about what WordPress can do and some quirks and shortcomings about what it can’t. As much as I want to be one of the cool kids running a JavaScript-based thing for my own site, it makes more sense to use WordPress and use it as a playground of sorts to experiment and get weird if I feel like it.

    Just like the answer to every car question is “Miata”, the answer to every website platform question is “WordPress”…

  • Reset WordPress Password Directly in Database

    My current job has found me in a sea of WordPress sites. Since we don’t allow (or want, at this time) users to register, the PHP mail() function is not enabled along with the security risks that PHP mail(); brings along with it. So what happens when a user needs their password reset? Currently, an admin has to manually set a new password. That’s fine and dandy but what happens if you only have one admin account and you’re locked out?

    The answer to that question is simple – reset the password directly in the database. Before you do that however, the new password needs hashed. You can use a simple MD5 hash to insert into your database which WordPress will run through its own wordpress_generate_password() function to create the proper form or you can use this tool that I built in order to create a ready-to-go WordPress password hash and example SQL query to run against your target database.

    Once you’ve got your hash, go into your WordPress database, and then find the ‘wp_users’ table. Inside of that table is a column called ‘user_pass’ – this is the field to enter your hash into.

    Execute the following SQL command (adjusted for your specific parameters):

    UPDATE wordpress.wp_users t SET t.user_pass = 'your-generated-hash' WHERE t.ID = 1;

    Replace “wordpress” with your database name and make sure you have the correct ID if you have multiple users otherwise, someone else is getting a new password.

    This can also be handy when installing WordPress within MAMP or MAMP Pro. I’ve found that in verisons 5 and 6 of MAMP Pro, when adding WordPress as an extra, the password you enter before MAMP installs WordPress never works. So, I’ve used this method to fix several WordPress installs when done through MAMP.

  • Replace Your Old Site URL with a New Site URL In Your WordPress Database

    I use the following SQL queries regularly to move databases between local, staging and development environments in my current role and have found them to be invaluable. There are plugins that can do this but a simple SQL query is going to be faster and the output from the SQL console will give you clear and concise feedback when executing. The following WordPress database queries are my “Swiss army knife” of tools when migrating databases across environments.

    First, to replace the Site Address (URL) and the WordPress Address (URL), use this query:

    UPDATE wp_options SET option_value = replace(option_value, 'http://www.your-old-domain.com', 'http://www.your-new-domain.com') WHERE option_name = 'home' OR option_name = 'siteurl';

    After that, we need to replace the URL’s contained within your post content, which is stored in the “post_content” column contained in the “wp_posts” table. To do that, use this query:

    UPDATE wp_posts SET post_content = replace(post_content, 'http://www.your-old-domain.com', 'http://www.your-new-domain.com');

    while we’re at it, we’ll also update instance of the old URL in the “guid” column. We’ll do that like this:

    UPDATE wp_posts SET guid = replace(guid, 'https://www.your-old-domain.com', 'http://www.your-new-domain.com');

    Your site will almost certainly work perfectly fine if you don’t update the “guid” column but if you rely on RSS then your feed will malfunction. Each guid is also a valid URL and each URL contained in the “guid” column will redirect you to the corresponding post so while this may not seem like a big deal if nothing is obviously broken, it is a significant piece in the overall health and proper function of your site.

    It’s also important to not overlook the “wp_postmeta” table. This table stores all of the data related to each post in your site. Any hardcoded instances of your old site URL can have a negative affect on the functionality of your site. To update the post meta_value, use this query:

    UPDATE wp_postmeta SET meta_value = replace(meta_value, 'http://www.your-old-domain.com', 'http://www.your-new-domain.com');

    Last, and this only applies if you use or have used the comments feature, is that we need to replace the URL’s in any comments made on your site. Top do that, use this query:

    UPDATE wp_comments SET comment_content = replace(comment_content , 'http://www.your-old-domain.com', 'http://www.your-new-domain.com');

    When the queries run successfully, you should see an output like the following:

    Query OK, 2 rows affected (0.03 sec)
    
    Rows matched: 2 Changed: 0 Warnings: 0

    Depending on how many rows the query will check, this may take some time. Updating the “meta_value” on one of my sites with almost 19,000 posts returned this console output:

    sitedb_wp> UPDATE wp_postmeta SET meta_value = replace(meta_value, 'https://www.my-old-url.com', 'https://www.my-new-url.com')
    [2023-10-02 10:23:42] 231,918 rows affected in 1 s 27 ms

    And likewise, updating the “post_content” column returned this console output:

    sitedb_wp> UPDATE wp_posts SET post_content = replace(post_content, 'https://www.my-old-url.com', 'https://www.my-new-url.com')
    [2023-10-02 10:26:03] 86,156 rows affected in 38 s 573 ms

    Keep in mind that I’m executing these queries on an AWS RDS instance that is size db.t3.medium so take your particular database infrastructure into account when running these commands. I can personally confirm that these queries work on WordPress versions 4.8.x up to 6.3.x. I don’t see this changing in future WordPress versions but who knows. Also, these queries do not take into account any third-party plugins or data that said plugins may be storing in your site’s database.